
Nowadays, the trend of distressed jeans is very popular. Most of the celebrities are promoting these kinds of jeans and they are also wearing these jeans.
If you’re purchasing distressed jeans from the store, it can be more costly. And you might hear it from your family saying why you’re spending so much money on jeans that have rips and tears in them.
So, you can turn your regular jeans into distressed jeans with the help of a shaving razor or pair of scissors. It is easy and fun to turn even unfashionable and oldest jeans into distressed jeans.
You can start this process by marking the areas that you want to distress, then cut horizontal lines with the shaving razor and remove threads with a pair of tweezers. Finally, you will have your own distressed jeans.
Here we put together an easy step-by-step guide on how to distress your jeans at home. So, follow the article till the end, you will know how to distress your jeans at home.
- Also Read : 18th Birthday Ideas for Girls That Are Unique and Fun
- Also Read : 08 Most Popular Blogs for Teenagers and College Students
Table of Contents
Tools You Will Need

It’s very important to think about all the tools that you’re going to use for this job. There are few things you will need to distress a pair of jeans at home. Most of the things you might already have in your home. The entire process required the following things.
- A pair of old denim jeans
- A pen or chalk
- A gloves
- A box cutter
- A cardboard or magazine
- Scissors
- A one-way razor or shaving razor
Also, you need to have access to a washing machine and dryer. You can purchase these items for your local store. Now, you will know all of the tools you will need for this job, then it’s time to get into it.
How to Distress Your Jeans?
01. Select the Jeans That You Want to Distress
Select the jeans that you want to distress. Remember you can distress any type of jeans at home and choose the pair of jeans that you don’t mind fraying and ripping. First, try to take old jeans you do not mind damaging.
02. Marking the Distressed Areas

This step is very important, put the jeans on and stand in front of the full-length mirror. So, you can easily determine the areas of the pants that you want to distress, like the thighs or knees.
Try the jeans on and mark the area where you want to distress (two inches above and two inches below where you want holes) using chalk, marker or pen.
- Generally, jeans are distressed at the back pockets, upper thighs, at the sides or knees. So, mark the area correctly where you want the rips to show when you are wearing the jeans.
- If you have never worn distressed jeans before, then try on old jeans. You do not mind damage.
03. Preparing the Jeans
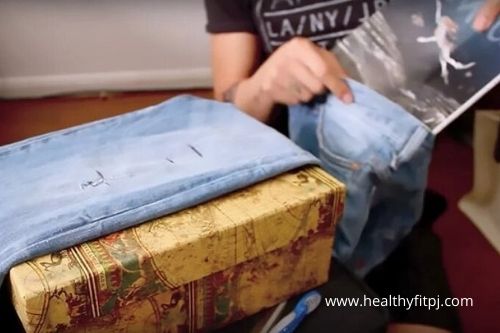
Now, it’s time to prepare the jeans to cut. It is important to stuff the pant leg with a newspaper or magazine, or even insert the cardboard into your jeans leg. This will protect the back of your jeans from being cut.
04. Distressing (cut) the Jeans
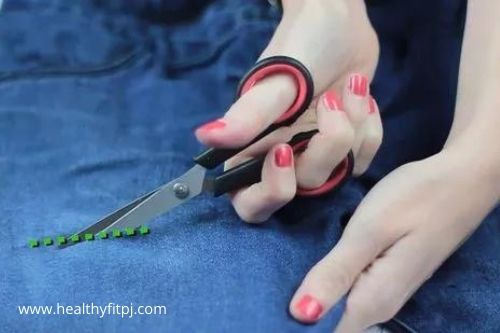
Once you prepare your jeans, you can start the distressing (cutting) process. Take the box cutter, shaving razor or pair of scissors to distress your jeans. Gently start to slide along the lines that you have already marked on the jeans that you want to distress. Continue to slice between the marks, creating horizontal lines across your jeans.
- Keep you cut about ½ of an inch wide
- We highly suggest making each strip a different length than the other one. This will create more of an authentic appeal and you will wear the jeans more often.
- Remember, only make a few cuts or lines.
05. Pull out Individual Threads with Tweezers
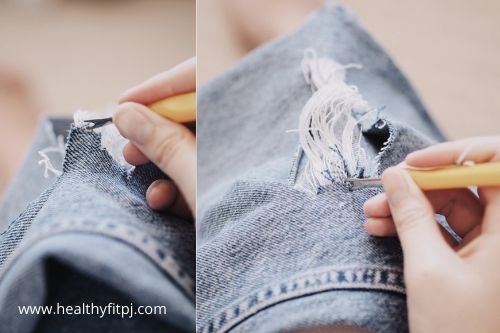
Once you have created all the slits or cuts are made. It’s time to use safety pins or tweezers to tease the white threads out of the denim.
Pull away the excess fabric with tweezers or safety pins until the holes are covered by threads. Only work in the area that you cut and pull out as many threads as you can. Remove all colored threads so only white elastic threads are spread across the cut or hole.
- You will not be able to remove all colored threads, there is something fuzz leftover around the edges of the hole. However, these things can come out in the wash.
06. Clean up the Area
Clean up the area with a lint roller because there is something loose thread and fabric on the jeans after you tweeze them. So, roll a lint roller over the areas where you distressed the jeans, it will remove excess fabric and clean the area.
07. Making Any Adjustments
Now, your jeans are thoroughly distressed. First, you can try them on and see if everything is fine and you are happy with the way they look.
If you find out that your jeans need a little more distressing. Then, follow the above steps until they can get the perfect look.
If your jeans don’t look naturally distressed, then you can use sandpaper. Single sheet of sandpaper, you can wear away at the denim so that it looks naturally distressed with minimal effort.
08. Wash Your Jeans
Washing your jeans right after distressed will help to remove the excess thread and any debris. While washing your jeans use cold water that can protect your jeans. Remember, hot or warm water should not be used on distressed jeans.
09. Avoid Some Common Mistakes
- Use the right jeans: not all the jeans are good and hold up during the distressing process. All the denim jeans come in different weights (weight should be written somewhere on the label). Use the right jeans like weighted jeans because these jeans can stand up better to the distressing process.
- Read the label before washing your jeans: most of the distressed jeans are more prone to damage in the wash, so it is important to read the label carefully. You will ensure that you know any special care instructions for your jeans.
- Wash your jeans infrequently: most of the distressed jeans do not need to be washed very often to prevent tears.
Some Tips for Distressing Your jeans
Below are some tips for making distressing your jeans easier and more exciting.
- Process should be slow: it’s very easy to distress your jeans, but it is important to work slowly and take your time so you can achieve the perfect distressing look without damaging your jeans.
- Add embellishments: you may also add some extra design (embellishments) like patches aside from the rips and tears. This will look more attractive and natural.
How to Distress Your Denim – Watch Video
Frequently Asked Questions
-
How Do You Make Jeans Look Old?
There is only one way you can make your jeans look old that is tears of wear, apart from this you can make your jeans look older by distressing them. Start by cutting slits across your knees, trim with a razor around your edges of the pocket.
Just make sure that it can be done carefully and as the jeans will continue to naturally wear over time.
-
Do Jeans Get Better with Age?
It depends on the texture of the jeans, if the texture loves it, jeans also live with you for a longer time. Then only they can get better with time, with age and with wear.
-
What Age Should You Stop Wearing Ripped Jeans?
A distressed jean is a very youthful look, and you should wear distressed jeans around the time you stop going to parties and music festivals. The older you became; the classic and refined look needs to become.
Conclusion
Here we learn about the steps on how to distress your jeans at home with 6 simple steps. It is very important to do it with proper items. While during this process go slowly and get the perfect natural look.
Hopefully, you like this article, if you have any questions and suggestions kindly put them in the comment box below.
You’ll also like: